Adding Data & Retraining
This tutorial shows you how to improve your AI model's accuracy by adding new images to an existing recipe and retraining the model. This process is essential when your model incorrectly fails good parts or when you encounter new variations in your production.
What You'll Learn:
- How to find and select images for retraining
- How to add images to an existing trainset
- How to label new training data
- How to retrain your model with the new data
When to Use This: When good parts are failing inspection, when you have new part variations, or when you need to improve model accuracy with additional examples.
Prerequisites
- Active recipe with a trained AI model (classification or segmentation)
- Access to the OV20i camera interface
- Images in the Library that need to be added to training
Step 1: Find Images for Retraining
1.1 Navigate to Library
- Open the OV20i interface
- Click "Library" in the left navigation menu
- You'll see all captured images from your camera
1.2 Filter Images
- Filter by Recipe: Select the recipe you want to improve
- Filter by Pass/Fail: Select "FAIL" to see failed images, or "PASS" to see passed images
- Sort By: Choose date or other criteria to organize results
- Click "Search" to display filtered results
Goal: Find images that were incorrectly classified - either good parts that failed or bad parts that passed.
Step 2: Add Images to Trainset
2.1 Select Images
- Review each image to identify incorrectly classified parts
- Select images that show:
- Good parts that were incorrectly marked as failed
- Bad parts that were incorrectly marked as passed
- Click the checkbox on each image you want to add
Add images that were incorrectly classified - this includes good parts that failed AND bad parts that passed. Both help improve model accuracy.
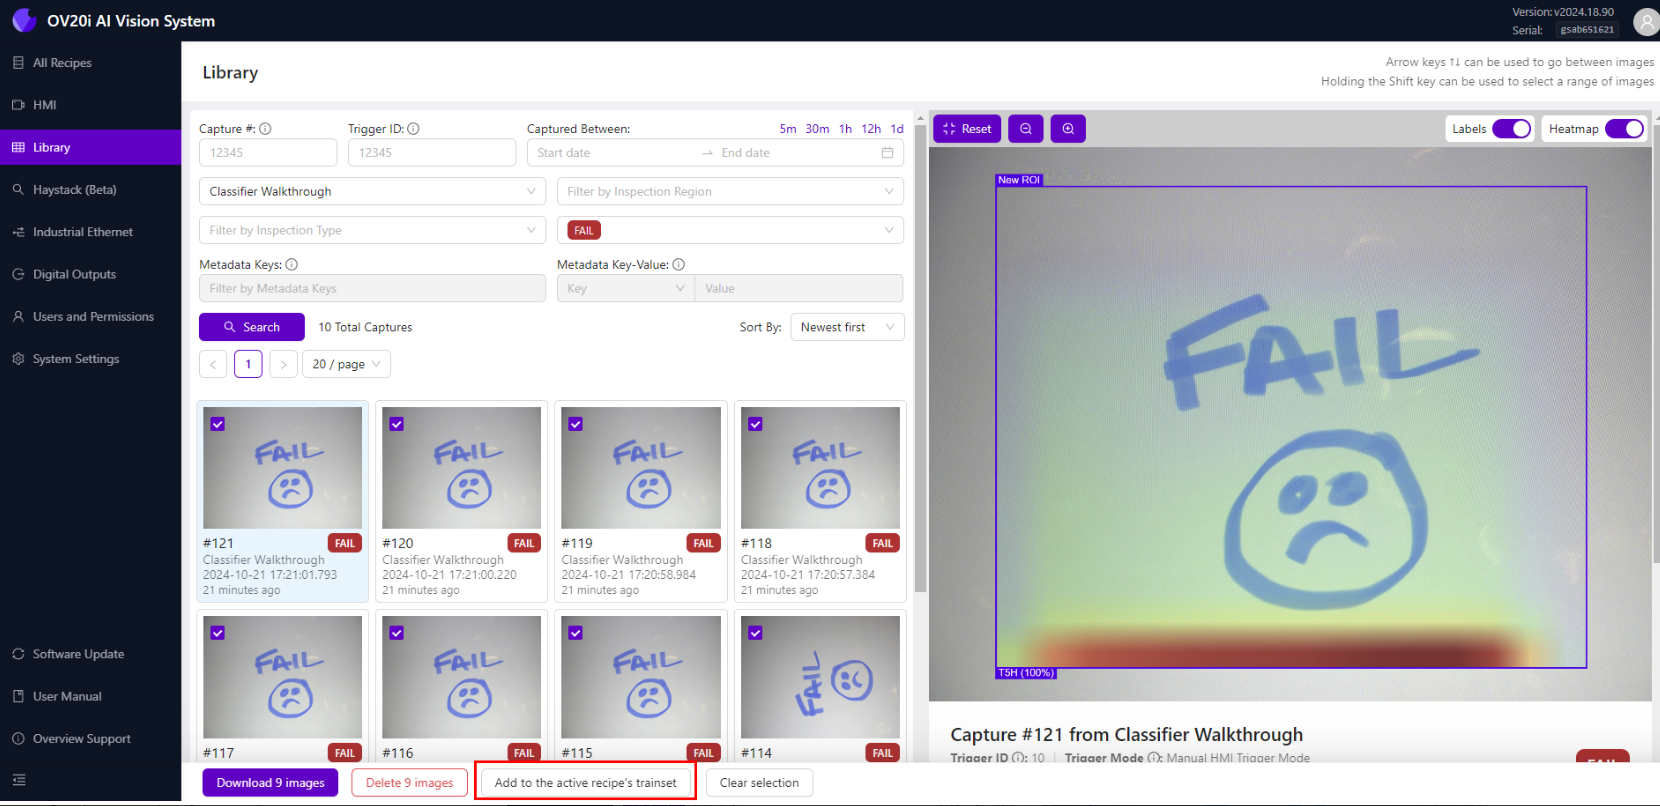
2.2 Add to Trainset
- After selecting images, click "Add to the active recipe's trainset" at the bottom
- A success message will confirm the images were added
- Click "Go to recipe editor" to continue
Step 3: Label New Training Data
3.1 Navigate to Label and Train
- From Recipe Editor, go to:
- Classification Recipe: "Classification Block"
- Segmentation Recipe: "Label And Train"
- Click "View All ROIs"
3.2 Find Unlabeled Images
- Use "Filter By Class" dropdown
- Select "Unlabeled" to show only unlabeled images
- You'll see the images you just added to the trainset
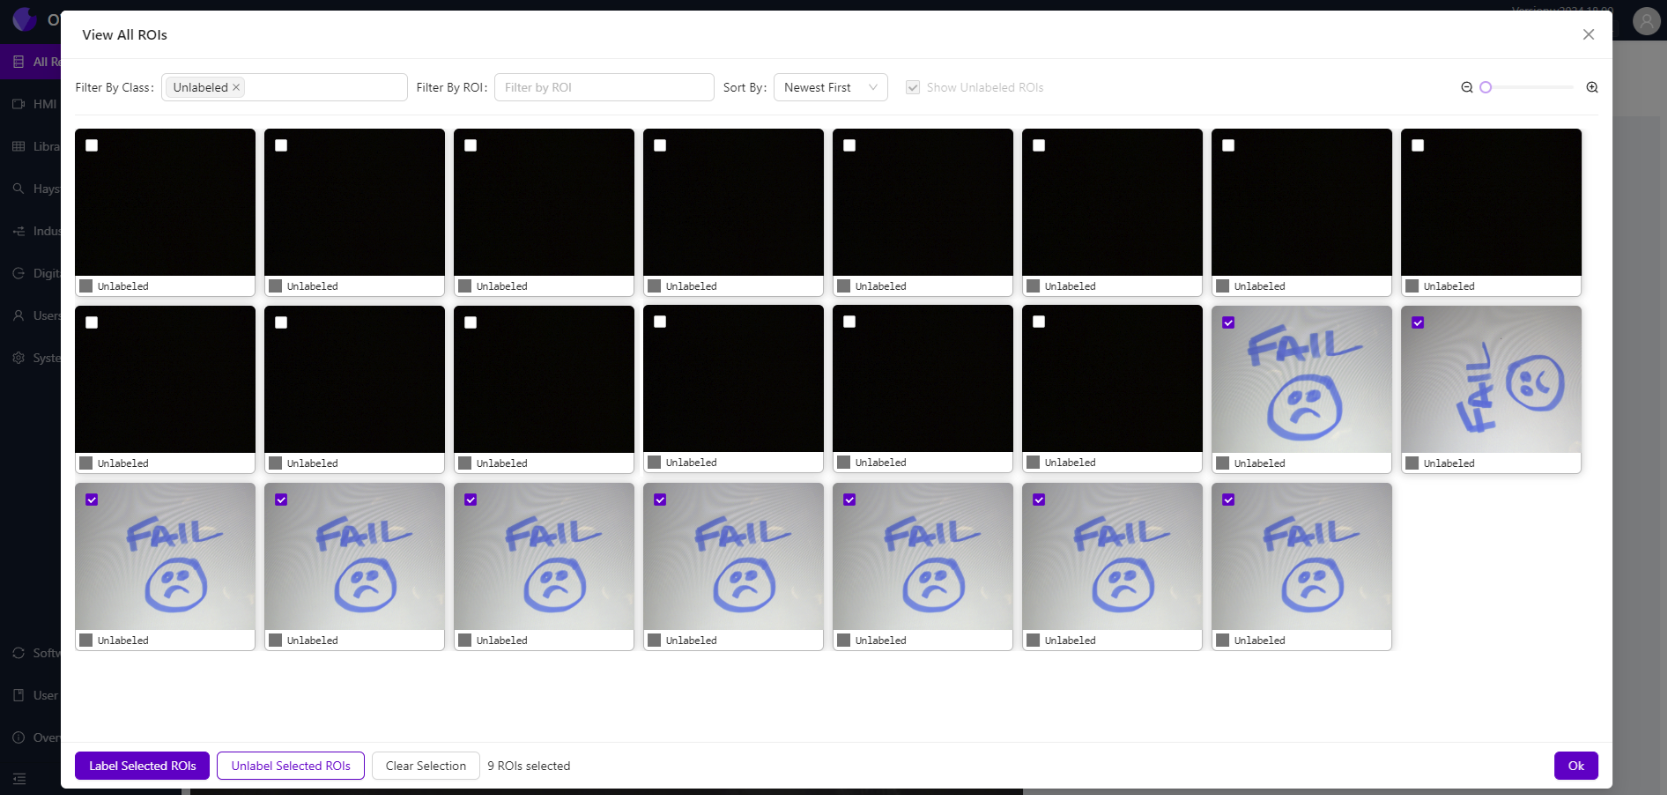
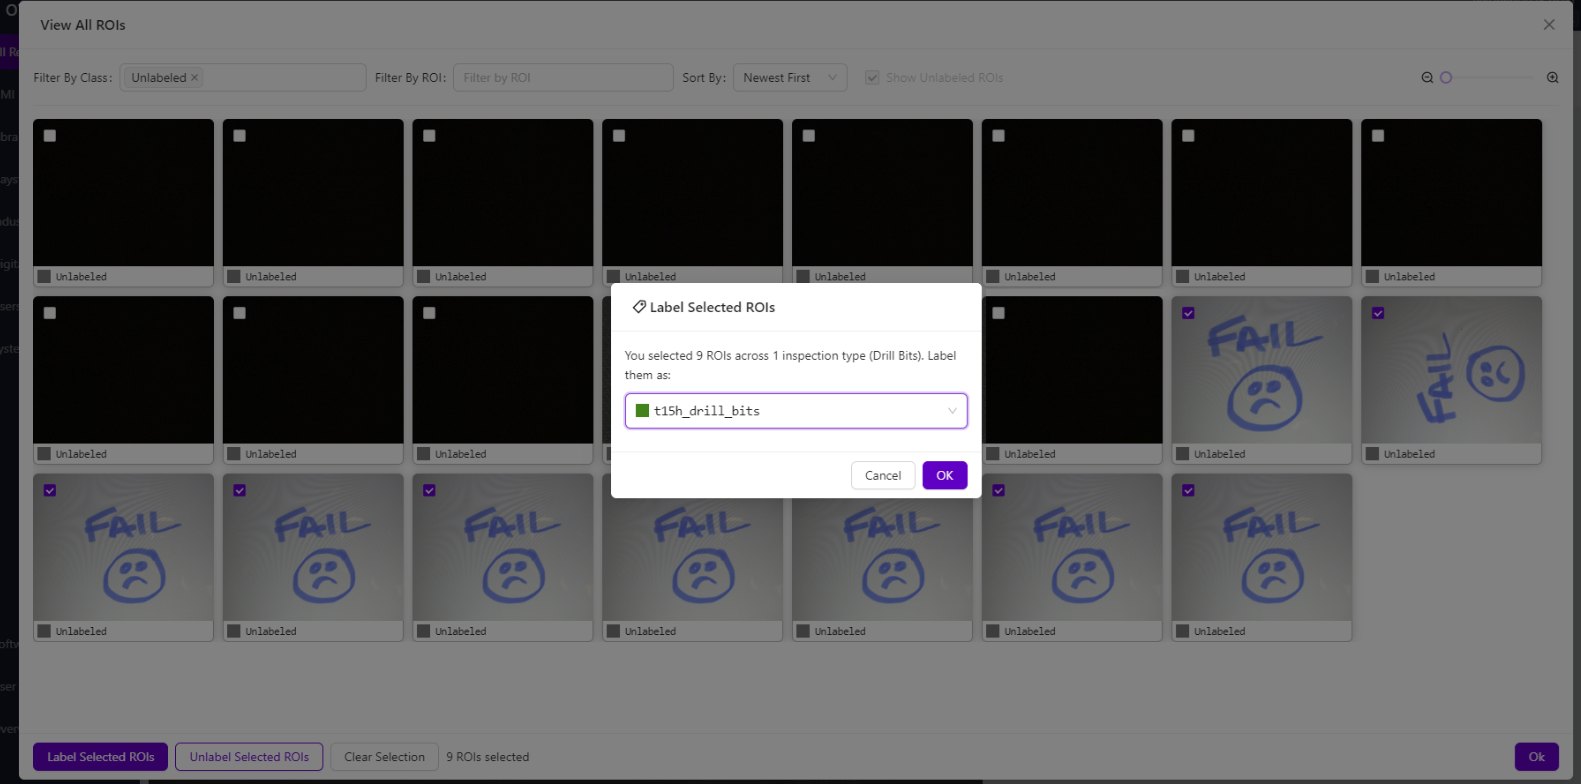
3.3 Label Selected Images
- Select all the unlabeled images you added
- Click "Label Selected ROIs" in the bottom-left corner
- Choose the correct label from the dropdown (e.g., "Pass", "Good", etc.)
- Click "OK" to apply the label
Click "Clear Selection" between different labeling sessions to avoid mislabeling.
3.4 Close ROI View
- Close the "View All ROIs" modal
- Return to the main Label and Train page
Step 4: Retrain the Model
4.1 Start Retraining
- Click "Train Classification Model" or "Train Segmentation Model"
- The system will retrain using all existing data plus your new images
- Monitor the training progress
4.2 Training Process
- The model learns from both old and new labeled data
- Training time depends on the total amount of data
- Wait for training to complete before testing
4.3 Test Improved Model
- Use "Live Preview Mode" to test the retrained model
- Test with the same images that previously failed incorrectly
- Verify the model now correctly identifies good parts as passing
Step 5: Validate Results
5.1 Test with New Images
- Capture new images of similar parts
- Check if the model performs better on edge cases
- Verify that previously good images now pass correctly
5.2 Monitor Performance
- Watch for any new false positives or false negatives
- Document the improvement in accuracy
- Note any remaining issues for future retraining
Success! Your Model is Retrained
Your improved AI model can now:
✅ Better identify good parts that were previously failing
✅ Handle new variations in your production parts
✅ Reduce false failures and improve accuracy
✅ Adapt to changes in your manufacturing process
Key Tips for Success
Data Quality
- Add incorrectly classified images (both false passes and false failures)
- Label consistently - good parts as "Pass", bad parts as "Fail"
- Include diverse examples of both passing and failing conditions
- Clear selections between different labeling sessions
When to Retrain
- False failures increase (good parts failing)
- False passes increase (bad parts passing)
- New part variations appear in production
- Process changes affect part appearance
- Seasonal variations in materials or lighting
Best Practices
- Start small - add 10-20 images at a time
- Test thoroughly after each retraining
- Document changes and improvements
- Keep backup of working models before major retraining
Next Steps
After retraining your model:
- Monitor production for improved accuracy
- Continue collecting problematic images for future retraining
- Set up regular retraining schedule if needed
- Train operators on when to flag images for retraining
- Document your retraining process for consistency